Daily Affirmations |Rooted In The Word

Recently I mentioned on Instagram, that I practice daily affirmations and it sparked a great discussion! One person in particular asked what some of my daily affirmations were, so I decided I would put together a suggestive list for anyone to use based on your preference. You have to make this work for you. Select the affirmations you need most in this season and feel free to switch some out as you go and grow.

Don’t know what daily affirmations are? That’s okay. Here’s a brief explanation.

In Psychology, affirmations are simple, positive statements (said with confidence) about a perceived truth. For example – Someone with low self esteem who wants to practice daily affirmations might say “I am good enough.” or “I am beautiful.” However, my approach to daily affirmations are from a Christ-centered point of view, rather than a self-centered point of view. This means I don’t recite my daily affirmations from a perceived (or interpreted) truth, but I speak from THE Truth – the Word of God. So rather than saying “I am beautiful.” I might say “I am fearfully and wonderfully made.” or “God created me in His image.” Make sense? If you have any questions about this, feel free to drop them below in the comments.
Daily Affirmations

Now without further delay, the list.

  1. I am a child of God.
  2. God sees me.
  3. God hears me.
  4. God knows exactly where I am.
  5. In my weakness, God gives me strength.
  6. God has a plan for my life.
  7. Nothing is impossible with God.
  8. I am chosen.
  9. I am not forsaken.
  10. I am not alone.
  11. God will never leave me or forsake me.
  12. God has not left me!
  13. His grace is sufficient.
  14. He knows my name.
  15. He has the very hairs on my head numbered.
  16. I am loved by God.
  17. Jesus died for me.
  18. I am free.
  19. I choose to live free from _____ through Christ, who is my strength.
  20. God is my refuge.
  21. This world is not my home.
  22. I am fearfully and wonderfully made.
  23. Nothing will surprise God today.
  24. He knows the end from the beginning.
  25. Jesus has heard my prayers.
  26. His will is perfect.
  27. I am a work in progress.
  28. God is still working on me.
  29. Jesus paid it all.
  30. The cross is enough.
  31. I will do my best and leave the rest for God.
  32. God has not given me the spirit of fear.
  33. God has given me the spirit of love, power and a sound mind.
  34. God is in control.
  35. Jesus is enough.

Are you kind of getting the hang of it? Many of these affirmations, I pair together. Sometimes I write them down or get super artistic with them, while other times I simply recite them to myself out loud or in my head. Getting in the habit of remembering these Biblical truths and affirmations has really helped me keep my thoughts and emotions under control, even on the craziest of days. Our mind is an open space and our thoughts are powerful. This is why it is so important that we are careful about what we allow ourselves to think about and dwell on. (Still I digress, as I don’t want this to get too long. lol)

I hope you find this list helpful and I encourage you to search the scriptures and write down some of your own. (Word to the wise: Keep the scripture within it’s original context. Don’t deviate from it’s intentional meaning. As my pastor’s wife says “The scripture can never mean something NOW that it didn’t mean back when it was written.” So good!)

What are some other Biblical affirmations I could add to this list? Share in the commentsbelow!

Until next time – Best + Blessings,

image1-2


Punny Valentines Day Party | DIY Party Planning

If there is one thing I love an awful lot, it has to be cheesy puns! Not because they’re actually funny but because they’re witty! That’s why when the thought crossed my mind to throw a Punny Valentines Day Party for our youth group at church – I knew I had to do it!

So I scoured the internet in search of the best puns, wrote a few myself and then designed an entire party around them! From decorations, to food – everything was a lot of PUN! (I mean, fun. 😉 You know I had to.)

When I was on IG live recently, I showed you all some of the graphics I made for it and you all really loved it! (Which made my pun-loving heart so happy!) So I decided to throw all the resources you need to plan your very own Punny Valentines Day Party into one blog post! Let’s jump right in.

Punny Valentines Day Food

PUNNY VALENTINES DAY FOOD IDEAS

Savory Foods
Pizza – “You stole a pizza my heart!”
Tacos – “Let’s taco-bout love.”
Chips + Guacamole – “You guac my world, Valentine!”
Chips + Salsa (Tomatoes) – “I love your from my head to-ma-toes.”
Queso – “In queso you didn’t know, you’re awesome!”
French Fries – “I only have fries for you!”
Tater Tots – “I like you an awful tot!”

Sweet Foods
Fruit Salad/Fruit Tray
– Pineapple – “You’re a fine-apple!”
– Watermelon/Cantaloupe/Honeydew – “You’re one in a melon, Valentine!”
– Apple – “You’re the apple of my eye!”
– Berries – “You are berry cute!”
– Pears – “We’re a perfect pear!”
– Grapes – “You look grape, Valentine!”
– Bananas – “I’m bananas for you!” or “I like you a whole bunch!”
– Oranges – “Well orange you cute!”
Donuts – “I donut know what I’d do with you!”
Ice Cream – “My heart melts for you.”
Cake – “Darling, you take the cake!”
Mints – “We are mint to be!”

Drinks
Tea – “Well aren’t you a cu-tea!”
Lemonade – “You’re my main squeeze!”
Coffee – “I like you a latte!”
Soda – “You are soda-lightful!”

Punny Valentines Day Decor

PUNNY VALENTINES DECORATIONS
All items in picture are linked here.

One of my favorite parts about this V-day theme is that not everything has to be pink and red or pink and purple. I went ALL OUT with color and black and white stripes to tie it all together! It was so much fun. Here are the supplies I used to decorate with (along with alternatives that might work better for you!

Tables
Round Colored Plastic Table Covers
-To cover the tables for seating and eating. #RhymingIsFun

Black and White Striped Plastic Table Covers
-I used two to cover the food and drink tables. I ALSO hung one on the wall as a photo backdrop. You can also, cut one into strips to use as table runners. You do you, boo boo!

Decorations
Cutie Fruity Foil Balloons
-These balloons were a HIT and took the party decor to the next level! I filled them up with a helium tank (This is the one I buy from Walmart.) 

120 Balloons – Rainbow Assortment
– I picked out complimenting colors and created bunches of balloons with the fruit ones, and set them on each table. Note: You will have A LOT of extra 12 in. balloons which you can use to create a balloon “swag.” (Kit linked next.)

Balloon Swag Supplies
– These supplies are SO easy to use and you will have extra tape/dots/supplies to use again later!

Glitter Heart Garlands
– I used this over the black and white stripe photo backdrop and it tied right in! 🙂

Graphics + Printables

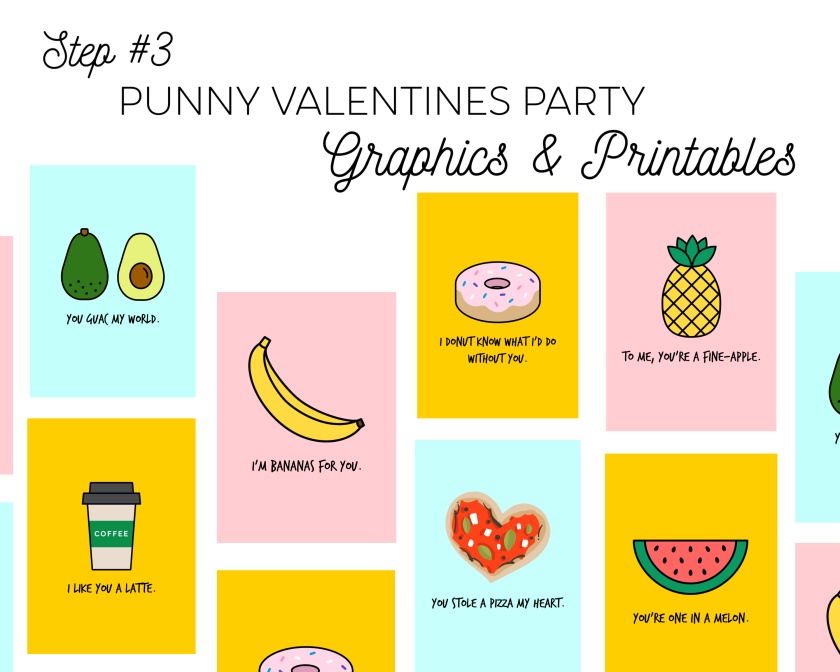
Punny Valentines Day Printables Graphics (1)

I created these Punny Valentines Printable Cards for the party we threw and I want to give them away to you FO FREE! If you want them, all you have to do is sign up for my email list and I’ll send them your way. 🙂

Okay guys! I hope you enjoyed this little party planning session – I know I did! If you decide to throw a little Punny Party, make sure to let me know here or on instagram. I’d love to see pictures!

Until next time – Best + Blessings!

Chrisi

Trust Me, It’s Harder the Other Way.

trust me, the other way is harder

I had an impactful yet short text conversation with a friend yesterday that left me in tears. She had wrote a reflective post on Facebook about what 2019 was like for her and her family. She listed off a handful of unfortunate events and trials they had faced throughout the year but then wrapped it all up by thanking God. Because no matter the situation or hardship, He had remained faithful.

After reading her post, I sent her a text thanking her for sharing it. It had resonated with me so much. She quickly responded, saying that she was glad it encouraged me and how trusting God was one lesson they learned the hard way.

This HIT me.

David and I have been praying some really big, important prayers lately and feeling very little, clear direction. But this? This was God responding to me. It was like He was sitting right in front of me, holding my hands in my lap saying “You don’t have to learn to trust me the hard way.” As I finished reading and responding to her text, I dropped my head and sobbed.

You see, I have always struggled with wanting to be in control of everything. I used to joke and say I was born with the bossy gene. *smirk* But over the years, I have had to face that bad habit head on. Every time I’ve prayed for God’s will to be done, I’ve had to put my will aside. And guess what? It wasn’t very easy. Trusting God is difficult. Keeping yourself from jumping to conclusions and making decisions without God is hard. WAITING… oh goodness… waiting is down right torture at times.

Now quickly accepting a new job that pays more? Well that’s easy. Leaving the church because you became offended by someone’s sideways comment about you? Selfishly easy. Justifying not stopping and praying with a homeless man, begging for money on the side of the road? Uncomfortably easy. But trusting God? That’s hard.

But can I tell you what God was saying to me in this moment? He was saying that not trusting him and making decisions on our own is easy to the flesh but hard on the Spirit. When we act without God, it redirects our paths away from the will of God; making it more likely that we are going to have to learn to trust God the hard way. Not as a punishment for making a mistake, but simply as a natural consequence for that decision.

While trusting ourselves is easy on the flesh, trusting God is “easy” on our Spirit. It’s what’s best for our Spirit. Now know – this isn’t me just talking to you from the other side. This is me, sitting smack dab in the middle of this test with you. We are still praying for direction in this season we are in BUT we are accepting the peace that comes with trusting God right where we are. Because in the long run, trusting God is easier. Not trusting God and stepping out of His will, will eventually cost you something.

My advice (to myself and you) is to follow God. Trust me, it’s harder the other way.

Until next time – Best + Blessings,

image1-2


Gift Ideas for Her | Current Faves

First, HAPPY NEW YEAR!

Over in Instagram land, many of you have been sending me messages about gifts I’ve shared in stories. And since I don’t have 10,000+ followers and the super cool swipe up feature – I’ve thrown together this quick blog post with links to ALL OF THE THINGS. (And they were all from Amazon – go figure!) Enjoy!

*This blog post does have affiliate links in it. If you see something you like here and choose to purchase an item through my links, I receive a small % commission from the company. This doesn’t increase what you pay at all! The commission I make is the companies way of compensating me for sharing one of their products. Please Note: I do not share things I don’t personally use (or have used) and value myself.

Christmas Gift Ideas for Her 2020

  1. BAYKA 34oz Double-Wall Stainless Steel French Press
  2. HEETA Hair Scalp Massager
  3. 6 in 1 Derma Roller Kit
  4. TOZO Ultra Thin Wireless Charger
  5. TOZO Wireless In-Ear Earbuds
  6. Waterproof Facial Spin Brush
  7. Arteza Water Brush Set
  8. Wet Brush Hair Brush Detangler w/ Intelliflex Bristles

As always, if you order something on this list and love it – let me know! I love hearing feedback from you. ❤

Until next time – Best & Blessings,

image1-2

27 Things I’ve Learned In 27 Years

img_9682

  1. God is faithful.
  2.  All people have the ability to change.
  3. Convictions > Restrictions.
  4. Disagreement does not equate hate.
  5. There’s usually more than ONE solution to a problem.
  6. Honesty without tact is cruelty.
  7. Not everyone receives love the same way.
  8. Not everyone gives love the same way.
  9. Slowing down and actually listening to people when they talk can change your life.
  10. Family looks different for everyone.
  11. A 5 minute tidy up in the AM and PM will change how you keep up with your home.
  12. 99.9% of the time you actually DO have something to wear.
  13. 99.9% of the time you actually DO have something to eat in your home.
  14. Cheering for others is life giving!
  15. Sometimes you just don’t get what you deserve… and it’s actually okay.
  16. Eating before going grocery shopping will INDEED save you money.
  17. Almost everything is “figureoutable.”
  18. Sometimes risks are worth it!
  19. Creating a life around what everyone else thinks is EXHAUSTING. Don’t do it.
  20. Always strive to please God first.
  21. Fear is a thief. Don’t let him in.
  22. Waiting 5 seconds to respond during a disagreement can radically change the outcome.
  23. Often times, forgiving others is more freeing for you than it is them.
  24. What you watch and what you listen to does have an affect on you.
  25. Pick your battles. Some arguments aren’t worth it.
  26. Being right isn’t everything.
  27. God is good. (This isn’t a cliche. He really is amazingly G O O D.)

DIY Wood Slice Picture Ornaments | DIY Christmas | How to

Happy Friday before Christmas 2019 (AKA – December 20th!) This week I taught a crafting workshop at a local biz Christmas party. Many of you over on Instagram were asking for a tutorial for the project we worked on so here it is! We made DIY Wood Slice Picture Ornaments, everyone’s looked great and we had fun!

Now let’s get started.

img_9473

Needed Supplies
4×6 Picture (Same Day Printing at Walgreens is what I used)
Scissors
Exacto Knife
1inch Foam Brush
Sharpie Pen
Mod Podge (Satin or Gloss finish works best)
Wood Slice Ornament (Here’s a link to the ones I bought on Amazon. Great deal!)
Twine (Mine came with my wood slice ornaments.)

img_9480

Step 1: Place ornament strategically on top of the subject(s) in your picture. Pay close attention to what isn’t covered by the slice. If you can still see it, it won’t be seen on the ornament. (Sounds like a no brainer but this step sometimes trips people up. Just pay close attention to where you place the ornament.)

img_9482

Step 2: With your sharpie pen, trace around the wood slice directly on your photo. If you are worried about the placement of the ornament, make a few small dots around the ornament first. Then check the placement and THEN trace around the entire thing.

img_9485

Step 3: Cut just INSIDE of the circle you drew.

img_9489

Step 4: Trim and check, trim and check! Keep trimming down the edges of your photo until there is a little bit of the wood slice showing around the entire photo. (This is important. You will need the space to help your picture adhere to the ornament.)

img_9493

Step 5: Using a foam brush, apply a thin layer of Mod Podge to the center of the wood slice. Then dab a little bit of Mod Podge in the center of your photo. Then place and press your photo on the ornament.

*Note: Be mindful of where you place your photo and where the hole on the ornament is. For example: Try to place faces away from the hole. You don’t want to poke a hole through someone’s forehead! 

img_9496

Step 6: You can do this step multiple ways.

Option 1: Take your exacto knife and poke an x shape into the hole of the ornament through the picture. Then gently fold the edges of the X you cut down into the hole.

Option 2: Take your exacto knife and cut a notch out of the top of the photo where the hole of the ornament is.

img_9499

Step 7: It’s time to seal these babies! Take your foam brush and apply a thin layer of Mod Podge HORIZONTALLY across the top of your ornament. Make sure to brush from edge to edge of the ornament without running off onto the sides of the wood slice.

img_9500

Step 8: Let it dry completely!

img_9503

Step 9: Apply a thin, second coat of Mod Podge VERTICALLY from edge to edge. Let it dry completely before handling.

img_9518

Step 10: Take the twine and string it through the ornament.

PRO TIP: Wrap some scotch tape around the end of the twine to help you string it through. Once strung, remove the tape and tie a knot towards the top.

img_9522

Step 11: Enjoy! Make an entire set! Give it as a gift! Use it as a gift tag! The options are endless.

I hope you enjoyed this project! If you follow my tutorial and try it out – let me know! Share it with me here or on Instagram using #ChrisiNikoleDIY!

Happy Crafting! Best + Blessings,

image1-2

DIY Personalized Name Crayons | How to

Christmas time is so much fun but can also be super stressful! One of my favorite things to do each holiday season is to DIY some gifts. It’s both fun and cost-effective! That’s a win-win!

Earlier this week on Instagram (@ChrisiNikole), I shared these personalized name crayons I made for each of my nieces and nephews. To my surprise, many of you asked me how I made them and what I used so I thought “I should share a tutorial on how to make personalized name crayons!”

So without further delay, let’s get to the process.

img_8979

Supplies I Used
Crayons (64 count for a larger variety of colors)
Plastic cutting board (one I will only use for crafts now)
A box cutter
A pairing knife
Small cups 
Silicone letter mold – FOR BAKING (link)
Baking sheet (one I will only use for projects now)

img_8981

Step 1: Remove the paper wrapper off each crayon and dispose of them.

This is definitely the most tedious part which I first tried to do by hand. But THEN David had the brilliant idea of using a box cutter on the shortest setting and cutting right through the paper. If you have a box cutter, this is the way to go!

img_8983

Step 2: Using a pairing knife (or other small knife) cut crayons into small discs. 

This is optional. You could just break them up and use bigger pieces of crayons. It just depends on the end result you want. I wanted to have a lot of colors and a lot of control over where the colors melted in each letter. So this was the way to go for me!

img_8982

Step 3: Plan out your letters.

Since I used just one mold and I had multiple names to make, this helped me get the most out of each bake. I knew I would have to make multiple batches because of duplicating letters so this helped me plan out how many bakes I would need for all of the names. (Especially when I was making some for all my nieces and nephews.)

img_8991

Step 4: Place mold on baking sheet and pick your colors!

This is the fun part! You can go all in and mix them all or you can get creative and try different color combinations! Here are a few of my favorites.
– Cool tones (blues, greens, purples)
– Warm tones (yellows, oranges, reds)
– Mermaid tones (purples, pinks, light blues)
– Dino tones (greens, yellow, orange)
-Cotton Candy tones (Pinks, blues, white)

img_9002

Step 5: Start filling your letters with crayons!

If there are certain colors you want to see on the front of each letter (for example if you want some variety from every other letter in the name) pay close attention to what color crayons you put in first. These colors will make up the front of each letter.

img_9014

Special Note: Make sure to fill each letter up to the edge (at least with this mold.) Once the crayons melt down, each letter will end up being about 1/2-3/4 inch thick. This is good! You don’t want your letter crayons to be too thin or they will just break when you go to color with them.

img_9019

Step 6: Fill up all your letters and double check that you have as many as possible in this batch!

img_9020

Step 7: Place baking sheet with mold inside oven.
Step 8: Turn oven on and up to 225 degrees F. (Thats right – you don’t need to preheat!)
Step 9: Let crayons melt in oven for 20 minutes.

img_9024

Step 10: Remove crayons and let them harden for 1 hour on your counter.

(Do not put in fridge.) 

img_9027

Step 11: Once hardened, carefully pull each side away from the mold BEFORE trying to remove it. Then gently (starting from the LONGEST edge of each letter) remove each letter.

Note: Depending on the brand of crayon you buy, you might notice that the back of each crayon letter is white. This is a sign of impurities in the original crayon itself and you can take a paring knife and scrape off the white if you so choose.

img_9041

Step 12: Enjoy! Give as a gift. Start coloring or even make some more!

Until next time – Best + Blessings!

image1-2

Have you heard the big announcement?!

I’m EXCITED! (If you haven’t heard already. *wink)

Chrisi Nikole Etsy Cover (3)

Chrisi Nikole Handmade on Etsy – COMING SOON!

It probably comes as no surprise that I LOVE creating new things. If you’ve known me for very long, you know that I am always coming up with ideas for new projects, gifts and home decor. A deep love for creativity is just in my blood!

One day while I was creating a pompom wreath for the front door of our first ever (non-rental) home, I said to my husband David “I could do this for a living!” When I said it, the meaning was more like I love making things so much. I could do it all the time. and less of I should quit my full time job and become a creative entrepreneur full time. But then David simply responded. “You totally could!” That one response started a series of big conversations, big prayers and then big decisions. Next thing we know – I’m working from home full time as a creative entrepreneur, living out my dreams! It’s crazy and totally surreal. I’m still having “pinch me” moments.

All of that brings us here. I am officially soft launching my Etsy storefront TODAY (11.4.19) Yes – it’s true! With the announcement of our first ever husband and wife project and product called Christmas is for Christ | Advent Calendar + Christmas Countdown, it is the perfect time to let you guys in on the secret.

For our soft launch today, we will feature our Christmas is for Christ | Advent Calendar + Christmas Countdown first. Then throughout the season, we will be working on more goodies and products to add to the shop. (Art prints, journals, ornaments, stocking tags, 2020 calendars, custom book stacks, custom door mats, etc!) Keep us in mind when you go shopping for special Christmas gifts this holiday season!

For now, keep your eye on Instagram and Facebook for exciting announcements and behind-the-scenes looks at some of the items we’ll be selling soon. If you don’t want to miss a release (and you like saving money) sign-up for my newsletter to get notified the exact moment Christmas is for Christ is available for pre-order!

Until next time – Best & Blessings!

image1-2