DIY Wood Slice Picture Ornaments | DIY Christmas | How to

Happy Friday before Christmas 2019 (AKA – December 20th!) This week I taught a crafting workshop at a local biz Christmas party. Many of you over on Instagram were asking for a tutorial for the project we worked on so here it is! We made DIY Wood Slice Picture Ornaments, everyone’s looked great and we had fun!

Now let’s get started.

img_9473

Needed Supplies
4×6 Picture (Same Day Printing at Walgreens is what I used)
Scissors
Exacto Knife
1inch Foam Brush
Sharpie Pen
Mod Podge (Satin or Gloss finish works best)
Wood Slice Ornament (Here’s a link to the ones I bought on Amazon. Great deal!)
Twine (Mine came with my wood slice ornaments.)

img_9480

Step 1: Place ornament strategically on top of the subject(s) in your picture. Pay close attention to what isn’t covered by the slice. If you can still see it, it won’t be seen on the ornament. (Sounds like a no brainer but this step sometimes trips people up. Just pay close attention to where you place the ornament.)

img_9482

Step 2: With your sharpie pen, trace around the wood slice directly on your photo. If you are worried about the placement of the ornament, make a few small dots around the ornament first. Then check the placement and THEN trace around the entire thing.

img_9485

Step 3: Cut just INSIDE of the circle you drew.

img_9489

Step 4: Trim and check, trim and check! Keep trimming down the edges of your photo until there is a little bit of the wood slice showing around the entire photo. (This is important. You will need the space to help your picture adhere to the ornament.)

img_9493

Step 5: Using a foam brush, apply a thin layer of Mod Podge to the center of the wood slice. Then dab a little bit of Mod Podge in the center of your photo. Then place and press your photo on the ornament.

*Note: Be mindful of where you place your photo and where the hole on the ornament is. For example: Try to place faces away from the hole. You don’t want to poke a hole through someone’s forehead! 

img_9496

Step 6: You can do this step multiple ways.

Option 1: Take your exacto knife and poke an x shape into the hole of the ornament through the picture. Then gently fold the edges of the X you cut down into the hole.

Option 2: Take your exacto knife and cut a notch out of the top of the photo where the hole of the ornament is.

img_9499

Step 7: It’s time to seal these babies! Take your foam brush and apply a thin layer of Mod Podge HORIZONTALLY across the top of your ornament. Make sure to brush from edge to edge of the ornament without running off onto the sides of the wood slice.

img_9500

Step 8: Let it dry completely!

img_9503

Step 9: Apply a thin, second coat of Mod Podge VERTICALLY from edge to edge. Let it dry completely before handling.

img_9518

Step 10: Take the twine and string it through the ornament.

PRO TIP: Wrap some scotch tape around the end of the twine to help you string it through. Once strung, remove the tape and tie a knot towards the top.

img_9522

Step 11: Enjoy! Make an entire set! Give it as a gift! Use it as a gift tag! The options are endless.

I hope you enjoyed this project! If you follow my tutorial and try it out – let me know! Share it with me here or on Instagram using #ChrisiNikoleDIY!

Happy Crafting! Best + Blessings,

image1-2

DIY Personalized Name Crayons | How to

Christmas time is so much fun but can also be super stressful! One of my favorite things to do each holiday season is to DIY some gifts. It’s both fun and cost-effective! That’s a win-win!

Earlier this week on Instagram (@ChrisiNikole), I shared these personalized name crayons I made for each of my nieces and nephews. To my surprise, many of you asked me how I made them and what I used so I thought “I should share a tutorial on how to make personalized name crayons!”

So without further delay, let’s get to the process.

img_8979

Supplies I Used
Crayons (64 count for a larger variety of colors)
Plastic cutting board (one I will only use for crafts now)
A box cutter
A pairing knife
Small cups 
Silicone letter mold – FOR BAKING (link)
Baking sheet (one I will only use for projects now)

img_8981

Step 1: Remove the paper wrapper off each crayon and dispose of them.

This is definitely the most tedious part which I first tried to do by hand. But THEN David had the brilliant idea of using a box cutter on the shortest setting and cutting right through the paper. If you have a box cutter, this is the way to go!

img_8983

Step 2: Using a pairing knife (or other small knife) cut crayons into small discs. 

This is optional. You could just break them up and use bigger pieces of crayons. It just depends on the end result you want. I wanted to have a lot of colors and a lot of control over where the colors melted in each letter. So this was the way to go for me!

img_8982

Step 3: Plan out your letters.

Since I used just one mold and I had multiple names to make, this helped me get the most out of each bake. I knew I would have to make multiple batches because of duplicating letters so this helped me plan out how many bakes I would need for all of the names. (Especially when I was making some for all my nieces and nephews.)

img_8991

Step 4: Place mold on baking sheet and pick your colors!

This is the fun part! You can go all in and mix them all or you can get creative and try different color combinations! Here are a few of my favorites.
– Cool tones (blues, greens, purples)
– Warm tones (yellows, oranges, reds)
– Mermaid tones (purples, pinks, light blues)
– Dino tones (greens, yellow, orange)
-Cotton Candy tones (Pinks, blues, white)

img_9002

Step 5: Start filling your letters with crayons!

If there are certain colors you want to see on the front of each letter (for example if you want some variety from every other letter in the name) pay close attention to what color crayons you put in first. These colors will make up the front of each letter.

img_9014

Special Note: Make sure to fill each letter up to the edge (at least with this mold.) Once the crayons melt down, each letter will end up being about 1/2-3/4 inch thick. This is good! You don’t want your letter crayons to be too thin or they will just break when you go to color with them.

img_9019

Step 6: Fill up all your letters and double check that you have as many as possible in this batch!

img_9020

Step 7: Place baking sheet with mold inside oven.
Step 8: Turn oven on and up to 225 degrees F. (Thats right – you don’t need to preheat!)
Step 9: Let crayons melt in oven for 20 minutes.

img_9024

Step 10: Remove crayons and let them harden for 1 hour on your counter.

(Do not put in fridge.) 

img_9027

Step 11: Once hardened, carefully pull each side away from the mold BEFORE trying to remove it. Then gently (starting from the LONGEST edge of each letter) remove each letter.

Note: Depending on the brand of crayon you buy, you might notice that the back of each crayon letter is white. This is a sign of impurities in the original crayon itself and you can take a paring knife and scrape off the white if you so choose.

img_9041

Step 12: Enjoy! Give as a gift. Start coloring or even make some more!

Until next time – Best + Blessings!

image1-2

Walmart Christmas Finds | Chrisi’s Current Faves

Tada! The first addition of Chrisi’s Current Faves is here. *Da da da da!* And what better way to start than with a Christmas Decor. roundup! Now, I did decide to split this post up into multiple but that’s because it was getting WAY too long. So I present to you my current faves from Walmart ONLY.

Walmart 

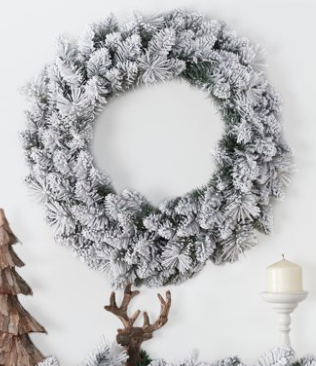
Walmart Flocked Wreath

24in. Flocked Wreath

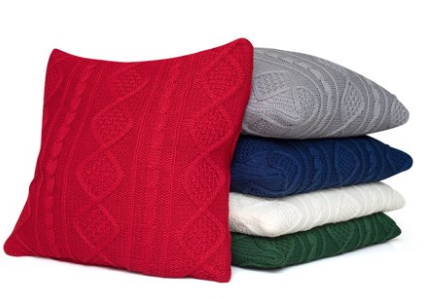
Cable knit pillow

Red Cable Knit Sweater Pillow 20×20

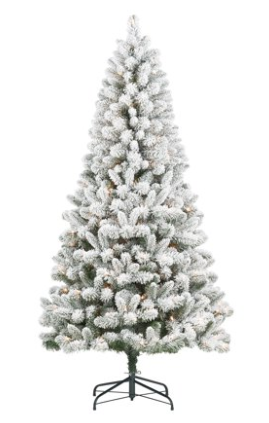
Cheap Flocked Christmas Tree

6.5 ft Flocked Christmas Tree

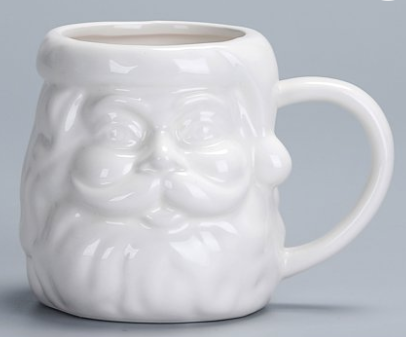
White Santa Mug

All White Santa Mug

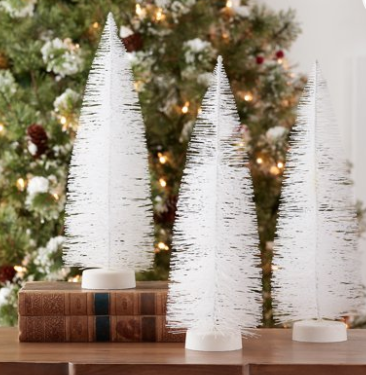
White Bottle Brush Trees

13″ White Bottle Brush Trees (Set of 3)


Happy shopping! Until next time – Best and Blessings!

image1-2


Have you heard the big announcement?!

I’m EXCITED! (If you haven’t heard already. *wink)

Chrisi Nikole Etsy Cover (3)

Chrisi Nikole Handmade on Etsy – COMING SOON!

It probably comes as no surprise that I LOVE creating new things. If you’ve known me for very long, you know that I am always coming up with ideas for new projects, gifts and home decor. A deep love for creativity is just in my blood!

One day while I was creating a pompom wreath for the front door of our first ever (non-rental) home, I said to my husband David “I could do this for a living!” When I said it, the meaning was more like I love making things so much. I could do it all the time. and less of I should quit my full time job and become a creative entrepreneur full time. But then David simply responded. “You totally could!” That one response started a series of big conversations, big prayers and then big decisions. Next thing we know – I’m working from home full time as a creative entrepreneur, living out my dreams! It’s crazy and totally surreal. I’m still having “pinch me” moments.

All of that brings us here. I am officially soft launching my Etsy storefront TODAY (11.4.19) Yes – it’s true! With the announcement of our first ever husband and wife project and product called Christmas is for Christ | Advent Calendar + Christmas Countdown, it is the perfect time to let you guys in on the secret.

For our soft launch today, we will feature our Christmas is for Christ | Advent Calendar + Christmas Countdown first. Then throughout the season, we will be working on more goodies and products to add to the shop. (Art prints, journals, ornaments, stocking tags, 2020 calendars, custom book stacks, custom door mats, etc!) Keep us in mind when you go shopping for special Christmas gifts this holiday season!

For now, keep your eye on Instagram and Facebook for exciting announcements and behind-the-scenes looks at some of the items we’ll be selling soon. If you don’t want to miss a release (and you like saving money) sign-up for my newsletter to get notified the exact moment Christmas is for Christ is available for pre-order!

Until next time – Best & Blessings!

image1-2

Fall 2019 Home Decor Mini Collection | Chrisi Nikole

I have been so excited about this release and I’ve been talking about it a lot lately on my Instagram and a little on my personal Facebook. You guys – it is officially here and you can OFFICIALLY begin placing your orders! *clapping with joy*

So without further delay, I present to you my first ever Fall Mini Home Decor Collection!

Custom Hand Lettered Door Mat

Custom Hand Lettered Door Mats
+ Dimensions – 24 inches x 35 inches x 1 inch
+ Rugged coir bristles (from coconut!) scrape off dirt, mud, moisture and debris
+ Vinyl backing helps keep mat in place
+ UV-protected color to assist in resisting color fade
+ Easy to keep clean – just vacuum or shake the rug

Hand Lettered Custom Faux Pumpkins
Custom Hand Lettered Faux Pumpkins
+ Available in 2 sizes. Small (6.5in) and Medium (9in)
+ Available in 2 colors. Orange and Off White
+ Unlike real pumpkins, you can reuse these over and over every year! Just carefully store them in a container, away from direct sunlight.
+ Easy to keep clean – gently wipe them down with a dry or damp soft cloth.

Hand Stamped Hand Lettered Book Stacks

Custom Hand Lettered Book Stacks
These may vary a little in size because they are REAL books that are being repurposed.
+ Each book will be at least 1 inch thick and at least 6 inches long. (The books shown here are around 7 inches long)
+ Each set of books will be close to the same size unless you specify that you would like more variety. 🙂
+ The outside of each book is the color of it’s natural pages. (White, off white, ivory, etc.)
+ Each stack will come beautifully tied together with twine.

Shipping Details for Door Mats (weight 7lbs)
UPS Ground – $13.27 per item Arrives in 2-3 days 
Fedex Ground – $12.77 per item Arrives in 2-3 days
USPS – $14.80 per item Arrive in 4-5 days

Shipping details for pumpkins and book stacks will depend on the quantity and size of the items you order. I will calculate shipping order by order and will discuss that with you at time or purchase. 🙂

THANK YOU! THANK YOU! THANK YOU! I am so excited to release this collection and I am ready to take your orders! If you would like to order something, you can follow this link to my instagram or this link to my facebook and send me a DM! (Or if you know my phone number, you can text me. Ha!)

Best + Blessings!

image1-2

PS – As a creative entrepreneur, this makes my heart soar! Last night during Face Mask Chat LIVE I spoke a little bit about my small biz background, my relationship with failure and why I do what I do. I felt compelled to share these things because you all were asking questions about what exactly I do and honestly, I needed clarification myself! So over the last month or so, as I was putting this collection together, I searched my heart and prayed about this very thing and I’m so glad I was able to share it with you all last night! Maybe one day I’ll write a blog post about it but for now, if you wanna know the details – check out the replay on my Instagram before it is gone. 🙂